3x3 Beginner Method
The Cross
Get Your Bearings
The center squares of the cube never move with respect to each other, so they serve as a reference point. We will think of the side with the yellow center as the top. The side with the white center is the bottom, which is the first layer we will solve. By solving the cube from the bottom up, the unsolved portions of the cube remain clearly visible during the solving process.
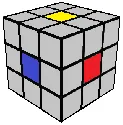
In this diagram, the blue center is on front, the red center is on the right, and the yellow center is on top.
The Cross
The first step is to make a cross on the bottom layer. You can use any color you like, but many people choose white because it is so easy to see. This tutorial will start with white, so we will make a cross by moving the 4 edges with white stickers around the white center square.
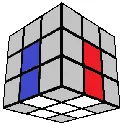
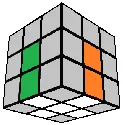
When we make the cross, the four side color stickers should align with the center sticker on each of the four sides (red with red, blue with blue, etc.). The completed cross is shown in the following two diagrams.
The Bad News
There are no set algorithms used to form the white cross. Here are some situations you may encounter and some ideas which may help you in making the cross.
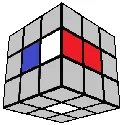
R') to move the white sticker in place.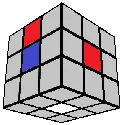
U' R2) to move it into place. U’ aligns the red sticker, and R2 aligns the white sticker.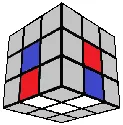
D' F' D2 F). D’ F’ aligns the blue/white edge and moves it out of the way to the middle layer. D2 aligns the red/white edge, and F restores the blue/white edge. If other cross pieces are in place, (R D R' D' R) works.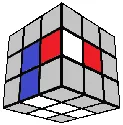
D' F D). D’ moves the blue/white edge out of our way. F moves the red/white edge to the bottom layer, aligning the white sticker. D aligns red with the red center while restoring the blue/white edge.Optional: The Daisy
If you find the cross hard, try making a daisy first. Keep yellow on top and gather the four white edges around the yellow center so that each white sticker faces up. The white edges look like petals around the yellow center.
Then turn the top until the side color of one petal lines up with its center (red with red, for example), and turn that side a half turn (for example, F2). This drops the white edge into the bottom layer with its white sticker facing down. Repeat for the other three petals. The daisy takes more turns than building the cross directly, but each step is easy to see.
The Good News
Because this step is entirely intuitive (without algorithms to help) it is actually the hardest step of solving the cube. Once you can make the cross, the rest will seem easier with a little practice! Next we will solve the white corners around the cross.