3x3 Beginner Method
Position Final Edges
This is the last step! Turn the cube so that yellow is once again on top.
Look to see how many of the four sides of the cube (other than yellow and white) are completely solved. If you are very lucky, all four will be solved, and you’re finished! Usually there will be 1 or 0 completed sides. (In other words, there will be 1 or 0 correct edges in the top layer.)
One Correct Side
If there is 1 correct edge, face the completed side and use this algorithm: (M2 U' M' U2 M U' M2)
Three-edge shuffle, clockwise
M2 U' M' U2 M U' M2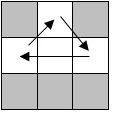
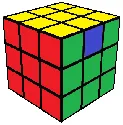
The algorithm shuffles the 3 incorrect edges clockwise. Note that you can change the direction of the shuffle by turning the top clockwise instead of counterclockwise: (M2 U M' U2 M U M2)
Three-edge shuffle, counterclockwise
M2 U M' U2 M U M2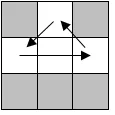
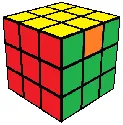
No Correct Sides
If there are no correct edges, do the 3-edge shuffle facing any side, and after that you should have one correct edge. Now you can solve the cube using one more 3-edge shuffle.
Congratulations, you have solved the Rubik’s Cube! If you memorize these steps, you can solve it consistently with a little practice.
What’s Next?
Once you can solve the cube without looking at this page, you can start solving it faster. The CFOP method builds directly on what you have learned here, and the Roux method takes a different approach with fewer moves and less rotation. If you are thinking about buying a faster cube, read the guide to choosing a cube.