3X3 BEGINNER TUTORIAL
Solving an edge in the middle layer entails three steps: align the edge, setup the edge, and solve the white corner. Our second layer algorithm is (URUR'U') and its mirror (U'L'U'LU).
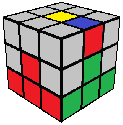
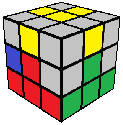
Align the Edge
Locate an edge piece on the top layer that has no yellow sticker. The edge piece has a top sticker and a side sticker, so be sure to check them both. (If there is no such piece, and the middle layer is not yet solved, skip to Setup.)
One you have found an edge piece without yellow, turn the top so that the side sticker of the edge piece is aligned with its center (e.g. red with red), and face that side.
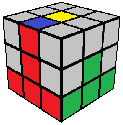
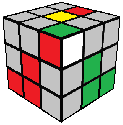
Setup the Edge
Look at the top sticker of the edge piece and the center stickers of the left and right sides to determine where the edge belongs: to the front right slot or the front left slot.
If all the top edges have a yellow sticker, but the middle layer is not solved, simply face a side that has an incorrect edge in the middle.
Note: The arrangement of yellow stickers in the top layer will vary from the diagrams above.
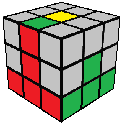
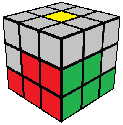
Solve the White Corner
When we setup the edge, we put one of the white corners in the top layer. Solve the white corner normally (the step after the cross), and the middle edge will be solved along with it automatically.
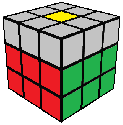
(RUR')
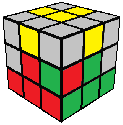
When you place all four middle edges correctly, the first two layers will be complete. We can then start solving the last layer, starting by orienting the last layer edges.
 Back
Back